You may customize many of the default parameters, design and analysis options in RISA-2D. In this way you can modify the program so that it best suits you and your work processes. All customization may be defined or redefined at any time. The Application Settings option on the Tools Menu provides you control over the behavior of the software. The Save as Defaults feature allows you to specify the default settings for new model files. These features are discussed below. Custom reports may also be defined and saved for future use. See Printing to learn how to build a custom report.
You may use the Save as Defaults feature in the following dialog boxes by entering the default information in the dialog and clicking the Save as Defaults button: Model Settings, Units, and Drawing Grids. This will cause the program to use these settings with any new files that are then created.
Many of the spreadsheets also provide the option to save the current
data as the default and every subsequent new file will already have that
data. Simply enter the data you want then save it as the default
by clicking on the ![]() button. This
way the office standards that you might use in most of your models are
already entered and available in new models. This feature is available
in the following spreadsheets: Materials, Custom Wood Species, Design Rules,
button. This
way the office standards that you might use in most of your models are
already entered and available in new models. This feature is available
in the following spreadsheets: Materials, Custom Wood Species, Design Rules,
Once you create a new file you may redefine any of the default data and settings for that particular file so the Save as Defaults feature may be used to give you a good starting point for new files but won’t hold you to those settings.
Program options may be accessed by selecting Application Settings from the Tools Menu and are divided into the five sections described below. Many of the Application Settings themselves are self-explanatory.
The general Application Settings are straightforward. For help on
an item click ![]() and then click that item. It may
be a good idea to disable the Automatically refresh… option when
working with large files or slower computers. You may also set the
backup timing. See Automatic
Backup to learn about the backup capabilities of RISA-2D. The Reset Customization Options
button will clear all of the Application Settings that you have set on any of the
tabs.
and then click that item. It may
be a good idea to disable the Automatically refresh… option when
working with large files or slower computers. You may also set the
backup timing. See Automatic
Backup to learn about the backup capabilities of RISA-2D. The Reset Customization Options
button will clear all of the Application Settings that you have set on any of the
tabs.
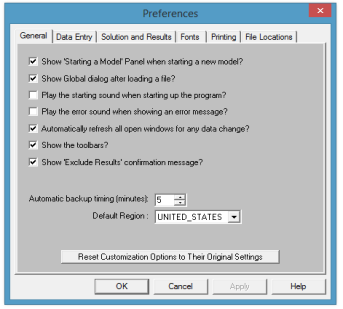
Show "Starting a Model" Panel when starting a new model – The New Model Dialog will be displayed when opening the program or selecting 'New File' from the File Menu.
Show Global dialog after loading a file – Displays the Model Settings settings automatically after loading a file.
Play the starting sound when starting up the program – A startup sound will be played when the program opens.
Play the error sound when showing error messages – An error sound will be played when an error is displayed.
Automatically refresh any open windows for any data change – Changes to the model will automatically be reflected in all windows – spreadsheets and model views. For large models you may want to limit the number of open windows or disable this feature altogether.
Show Toolbars – All toolbar commands may also be found in the menu system so if you want more work space you may disable the toolbars.
Show Exclude Results confirmation message – After solving the model you may use the Exclude Feature to graphically select items that you wish to see in the results spreadsheets, "excluding" other results. This enables a confirmation message warning you that some results are not shown.
Automatic backup timing – Automatic backup of the currently open model occurs at the specified interval. Each backup overwrites the previous one, such that only one backup of a given model exists at any time.
Maximum Number of Models to Backup - This controls how many models are kept in the backup folder. Once the folder becomes "full" according to this setting, the oldest backups will be deleted automatically. Setting this to zero turns off automatic backups.
Reset Customization Options – Choose this to return to the program defaults.
Default Region - Choose the default region for your projects.
Show detailing information in the model - Choose to display the Detailing information in the spreadsheets, draw dialogs and member information dialogs.
To use bigger or smaller fonts in the spreadsheets you may adjust the
row heights. You may also specify the number of decimal places that
are displayed. The one exception is the Joint Coordinates.
RISA-2D
maintains the coordinates to 15 significant figures and the exact value
is always displayed.
If you wish to use a prefix with your joint, member, and plate labels, such as “J” with joints, you can specify the default prefix. These prefixes may be changed as you build your model.
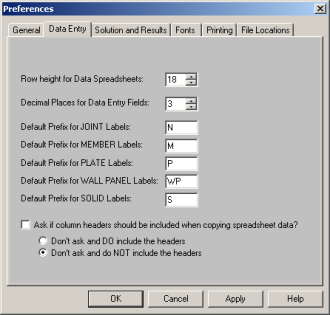
Row height for data spreadsheets – Sets the row height and font size for data spreadsheets.
Decimal places for data entry fields – Sets the number of decimal places to display in the data spreadsheets with a maximum of four places.
Default prefix for JOINT labels – Sets the default prefix to be used in joint labels.
Default prefix for MEMBER labels
– Sets the default prefix to be used in
Default prefix for PLATE labels – Sets the default prefix to be used in plate labels.
Default prefix for WALL PANEL labels - Sets the default prefix to be used in wall panel labels.
Ask if column headers should be included when copying... - If this checkbox is checked then the program will ask if you want to copy the spreadsheet header any time you attempt a copy command in a spreadsheet. If this checkbox is not checked then you have the option of either always copying the spreadsheet headers, or never copying them.
At solution time RISA-2D finds and locks any instabilities to allow the solution to occur. See Stability to learn more about this. Rotational instabilities are commonly inconsequential and RISA-2D allows these instabilities to be locked without any warning.
RISA-2D can provide a warning when clearing results. To use bigger or smaller fonts in the results spreadsheets you may adjust the row heights. You may also specify the number of decimal places that are displayed. The number of figures displayed may not be the actual number. Behind the scenes RISA-2D maintains numbers to numerous decimal places.
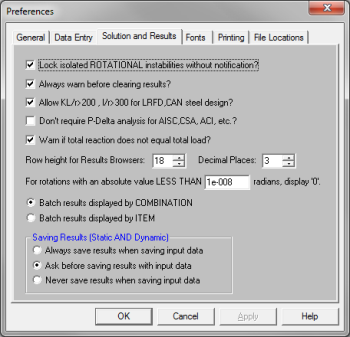
Lock isolated ROTATIONAL instabilities without notification? – Locks insignificant rotational instabilities at solution time without warning. This will cut down on joint instabilities that are technically unstable but in practice are unnecessary.
Note:
Always warn before clearing results? – Verifies that results are to be cleared to edit the model.
Allow KL/r>200, l/r>300 for LRFD,CAN steel design? – Waives the slender check for slender members.
Don't require P-Delta analysis for AISC, CSA, ACI, etc.? - Waives the P-Delta analysis requirement for certain design codes.
Warn if Total Reaction does not equal total load? - Enables a check in the program to confirm that the total applied load equals the sum of the joint reactions. See the Warning Log topic for more information on this.
For additional advice on this topic, please see the RISA Tips & Tricks website: www.risa.com/post/support. Type in Search keywords: Sum of Reactions.
Row height for Results Browsers – Sets the row height and font size for results spreadsheets.
Decimal Places – Sets the number of decimal places to display in the results spreadsheets with a maximum of four places.
Rotation Limits – Shows 0 for the rotation when smaller than this value.
Batch Results Display - The results of a batch solution may be grouped by load combination or by item. For example you can group results for all members under each particular load combination or you can group results from each combination under a particular member. The setting here is merely a preference. Once you have solved a model you can switch back and forth using the Results Menu.
Saving Results – These options let you control what is done with the results when saving a file.
The font Application Settings can be used to adjust the fonts used by the spreadsheets, results browsers, and graphics. The font changes will affect both the on-screen displayed data and the printed data. The exceptions to this are the spreadsheet and browser fonts which may be changed for on-screen display but are hard-wired for printing purposes.
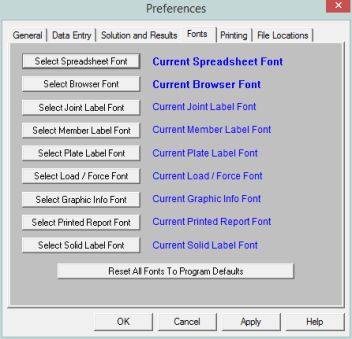
If the font data has be set to some unusual settings, then the user can click the Reset All Fonts to Program Defaults button to restore the fonts to what is normally expected for the RISA program.
This tab gives many options for printing output. See Printing for additional information.
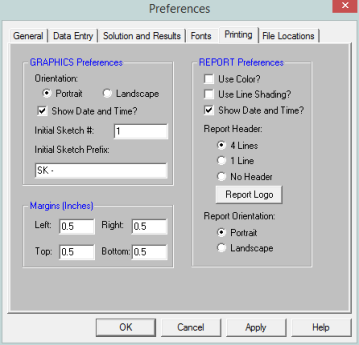
Orientation for graphics – Sets the default paper orientation for graphic printing.
Sketch Information - Sets sketch numbers and prefixes for graphic printing.
Margins – Sets the default printing margins.
Report Application Settings – These allow you to define information about colors, date and time, headers, report logo and overall report orientation.
Use Line Shading? - Defines whether the spreadsheet output shades every other line. This can give contrast to make the information easier to read.
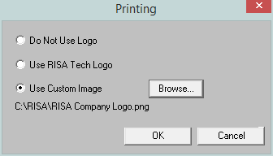
Report Logo - Allows you to add either a RISA logo or any company logo to your printed output.
The locations for data files, databases, temporary space, importing, and backing up may be specified separately by choosing from the list.
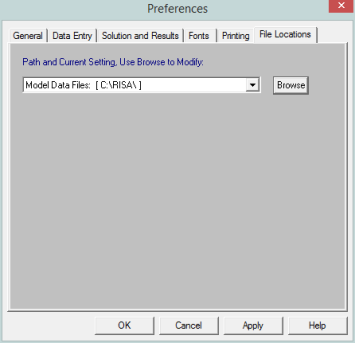
Path and current setting – For each file type in the list the current setting is displayed. Click the drop down list to view different file types. Click the browse button to choose a different location.